Unveiling the Art of Self-Portraiture: A Budget-Friendly Three-Light Setup

Introduction:
In the realm of self-portraiture, creativity knows no bounds. One need not possess an extensive budget or fancy equipment to craft captivating images. In this blog post, I’ll take you behind the scenes of a recent self-portrait session where I employed a modest three-light setup, proving that creativity is the true driving force behind remarkable photography.

The Vision: Moodboard as a Blueprint:


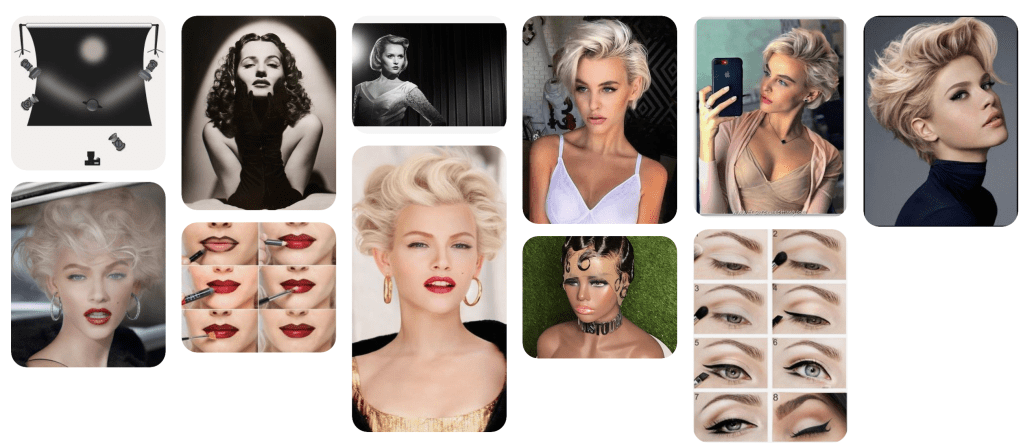
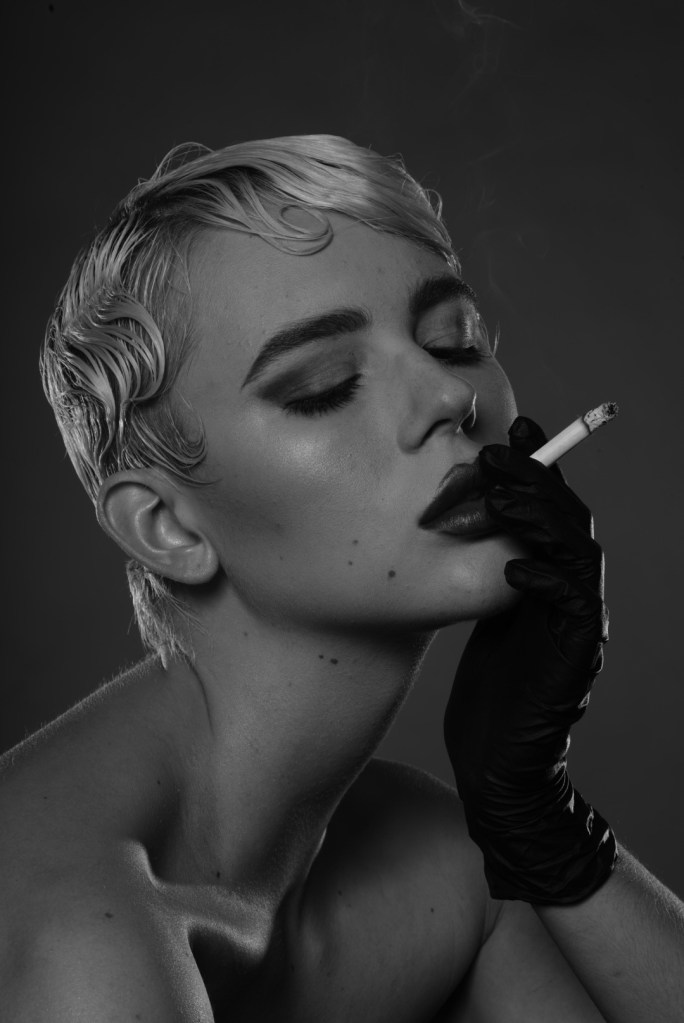
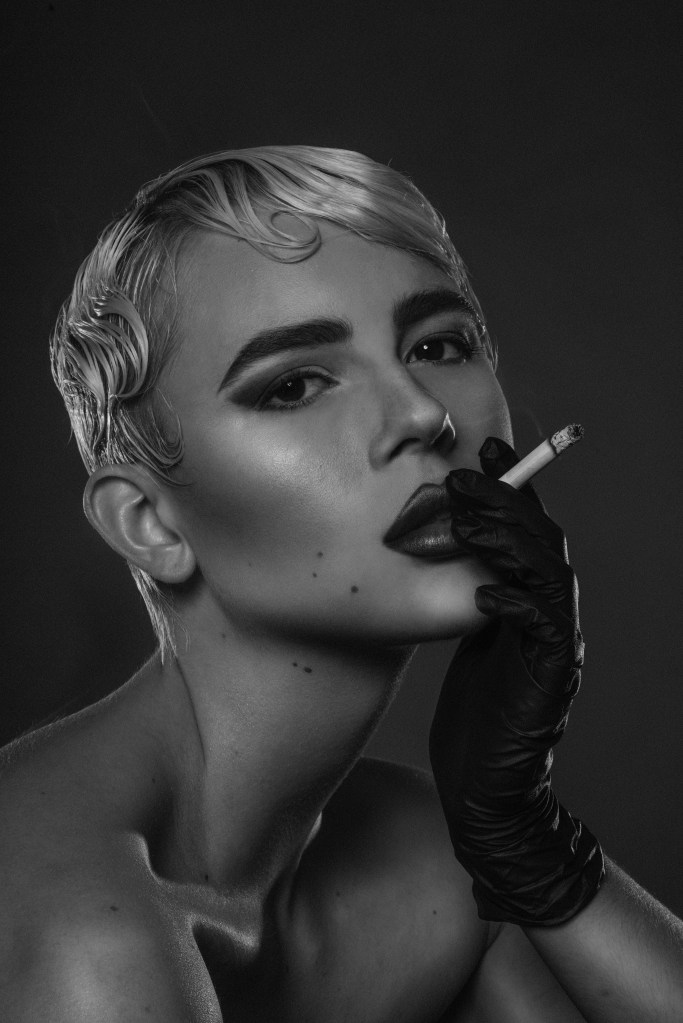
Every successful photoshoot begins with a vision. To translate my ideas into reality, I created this mood board – a visual blueprint that served as my guide. This collection of images, and aesthetics set the tone for the shoot, helping me conceptualize the final result. The concept was simple. I wanted a glam, vintage pinup look, dramatic but flattering lighting, and black and white.

The Preparation:
I’ll admit I am not very good at hair and makeup. I have short hair because I thought it would be the least maintenance (it’s not). Luckily there were a bunch of tutorials on youtube to help me get the look I desired. I knew that photographs with the right lighting have a magical ability to make everything look better, so I only needed to get the general idea. The rest could be fixed in post, or fixed by shooting from the right angles.

The Setup:
1. Key Light: Beauty Dish for Dramatic Flair

  • For the main light, a single beauty dish took center stage. Elevated high above me and angled downward, this light source cast flattering yet dramatic illumination on my face. The beauty dish, known for its soft yet defined shadows, became the hero of the shoot, sculpting my features with precision.


1. Back Lights (Strobes with Reflectors):

  • Positioned strategically at the back left and right, two strobes equipped with reflectors played the role of backlights. This placement not only added dimension to the images but also created a beautiful separation between me and the background. Working with available resources, reflectors were used to maximize the impact of these lights. The backlights created captivating highlights on the edges, adding a touch of magic to the overall composition.

My original inspiration from the moodboard was a 4 light set up, with a spotlight on the background. I am sure that would have been a great effect, but I only had 3 lights to work with at the time so I opted to leave that one out. I believe the inspiration also included different lighting modifiers, but I used what tools I had available, and made it my own!

For Reference:

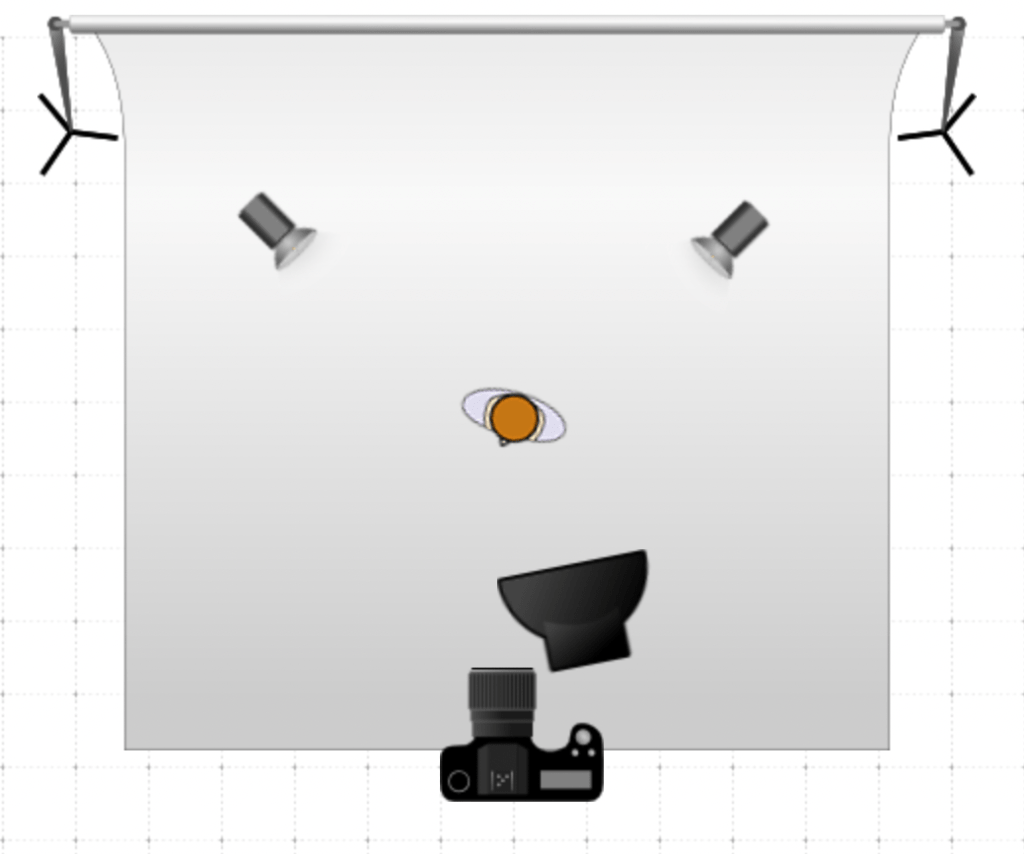
My background was actually dark grey, but I positioned myself far in front of it, with no light spilling on to the backdrop to make it appear black!

Working with Constraints:
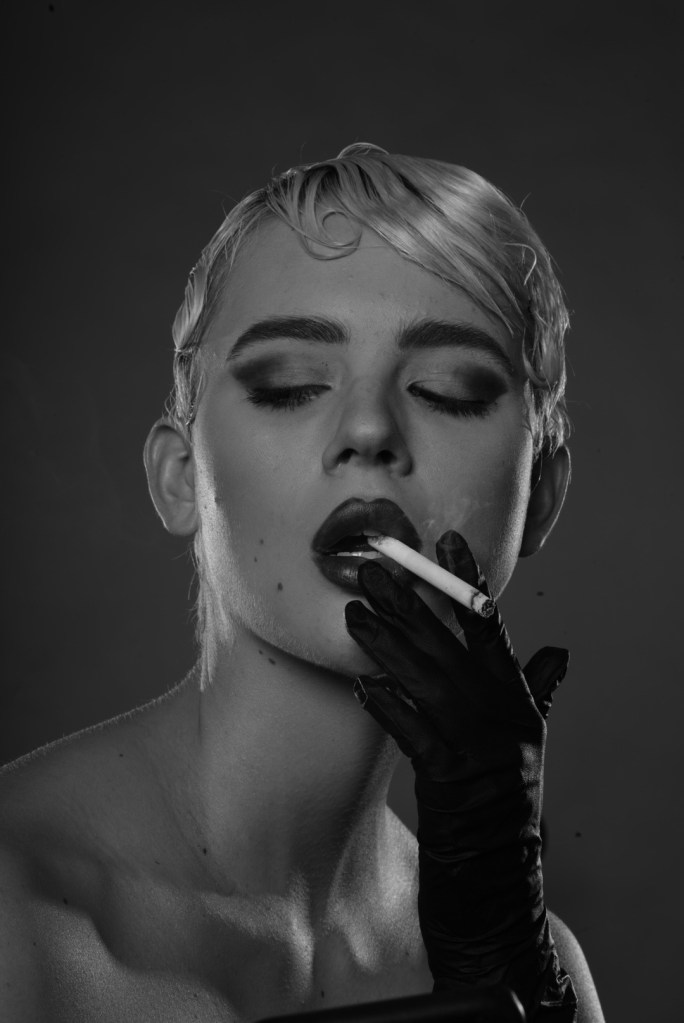
Photography, at its core, is an art form that thrives on innovation, and constraints often fuel creativity. I wanted long elegant black gloves, unfortunately black latex gloves from a local adult store were all I had available. I decided to use them anyway because I think it is a more interesting and unexpected choice.
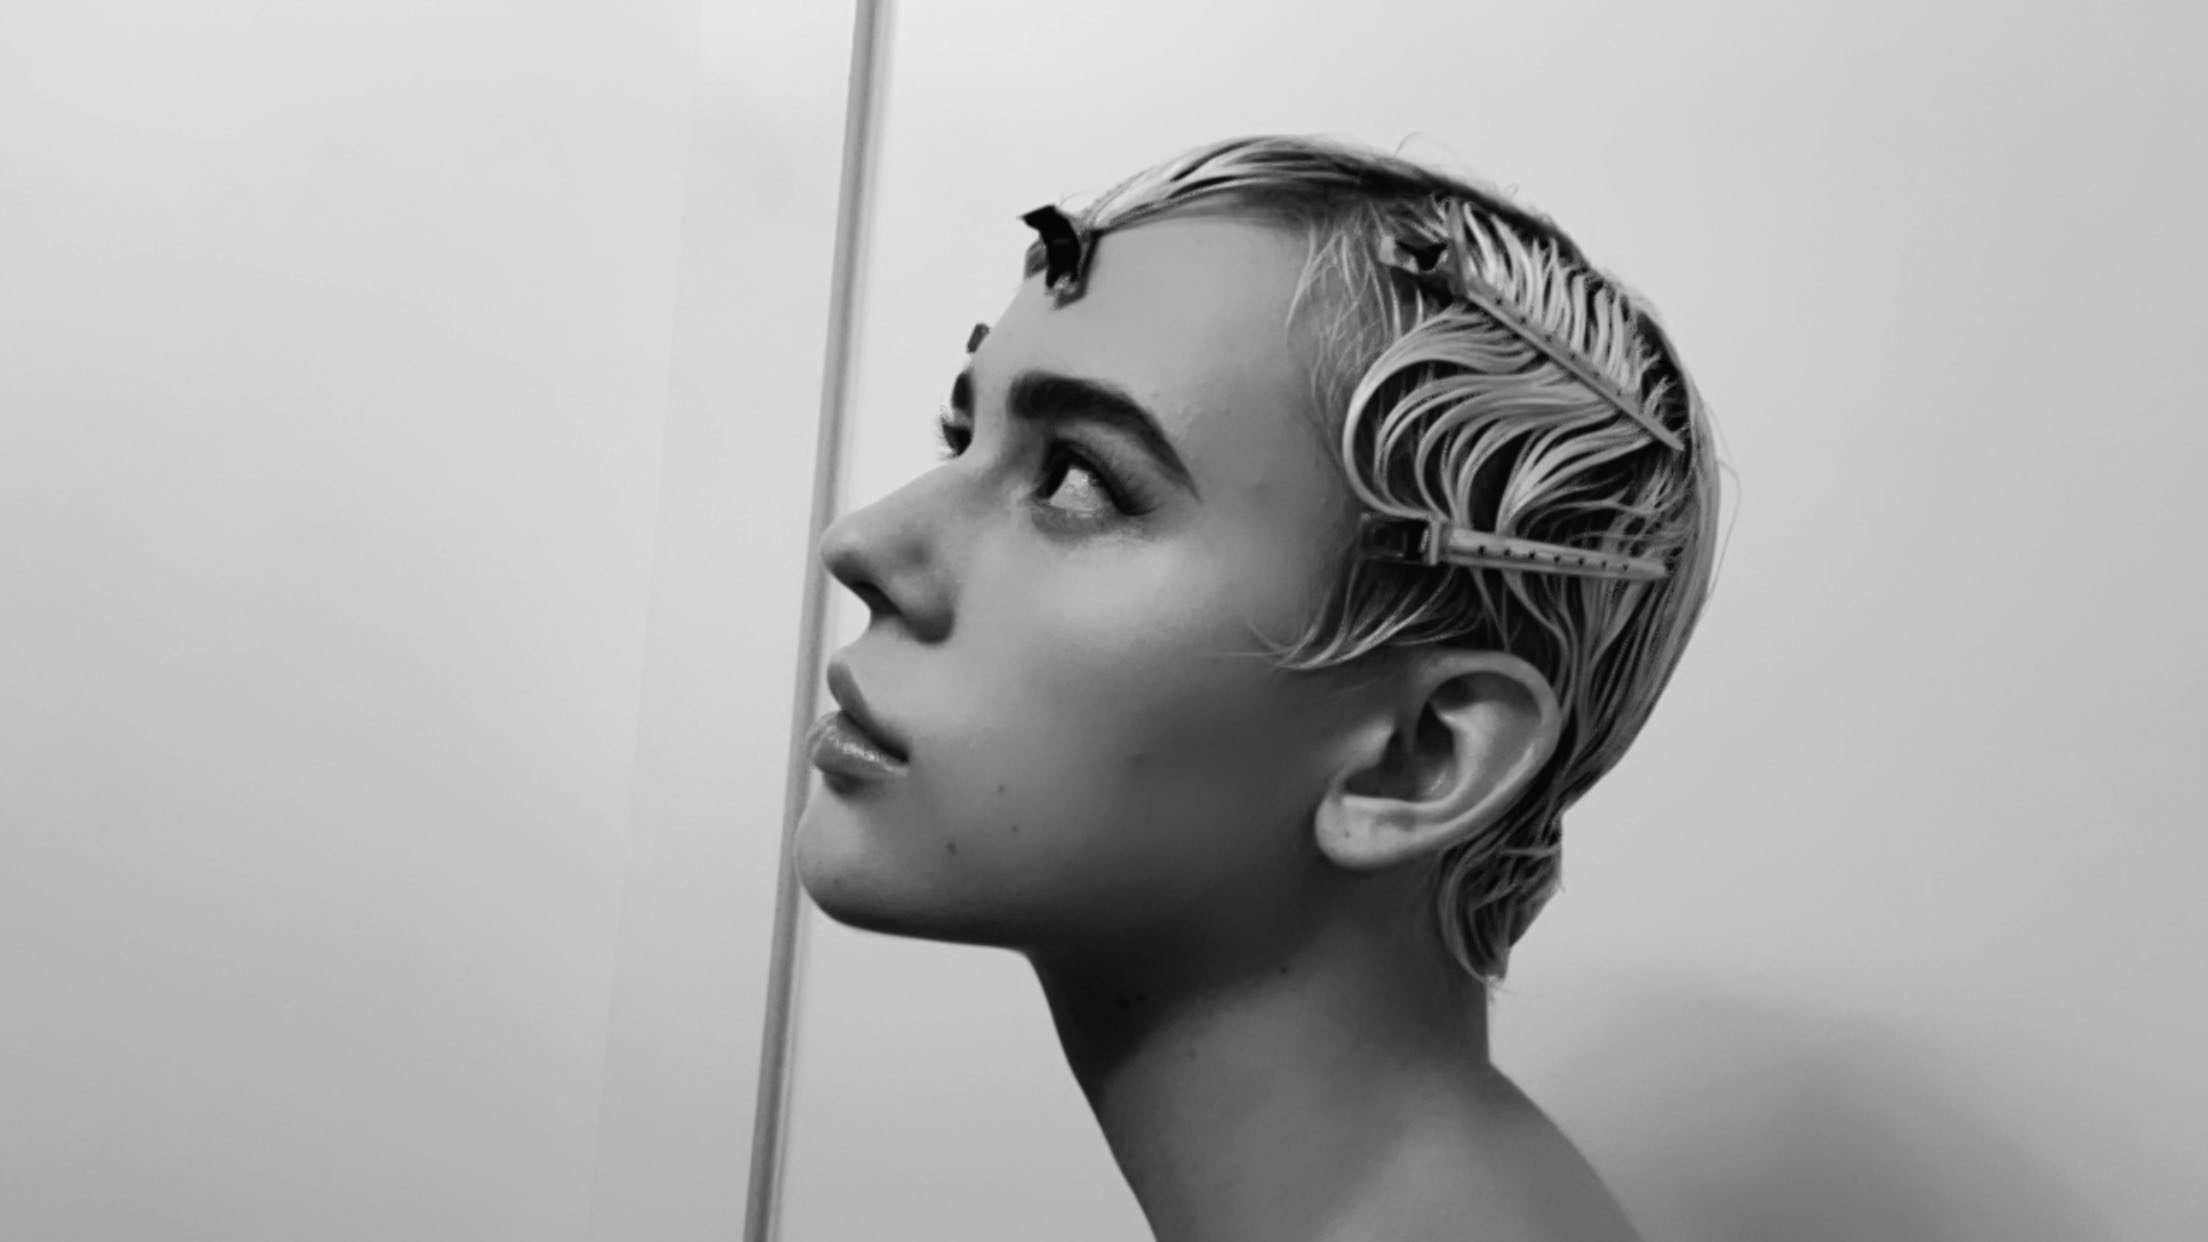
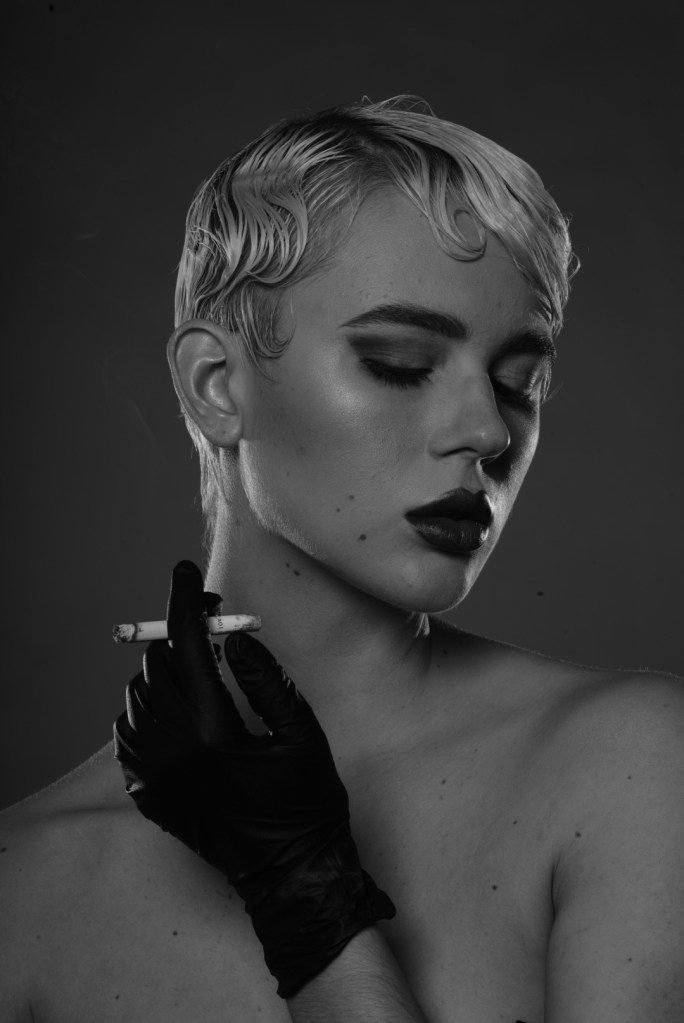
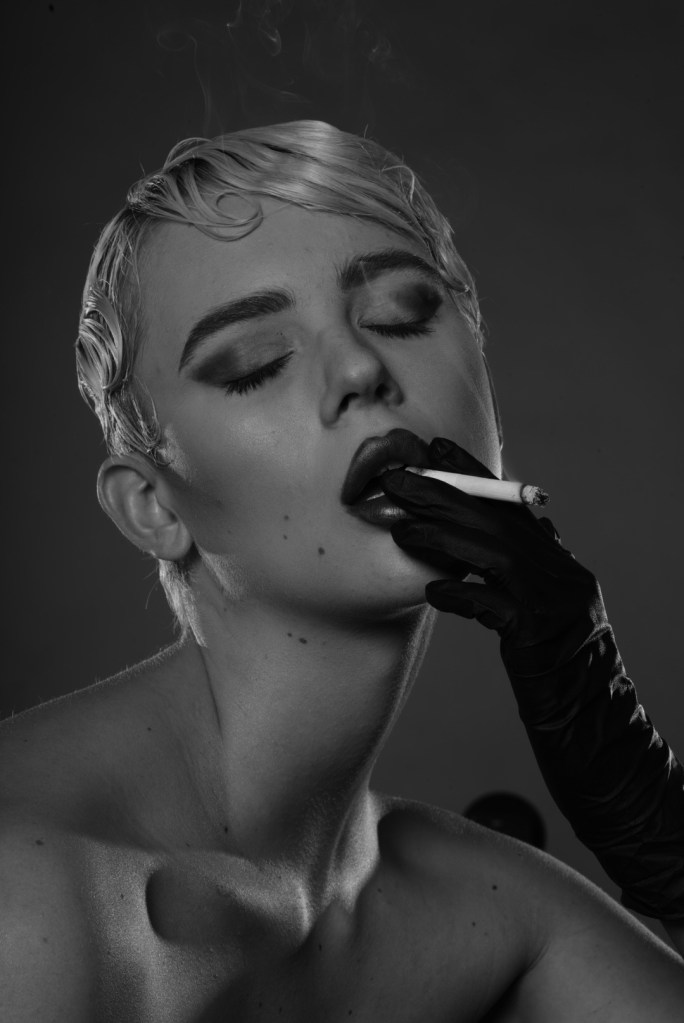
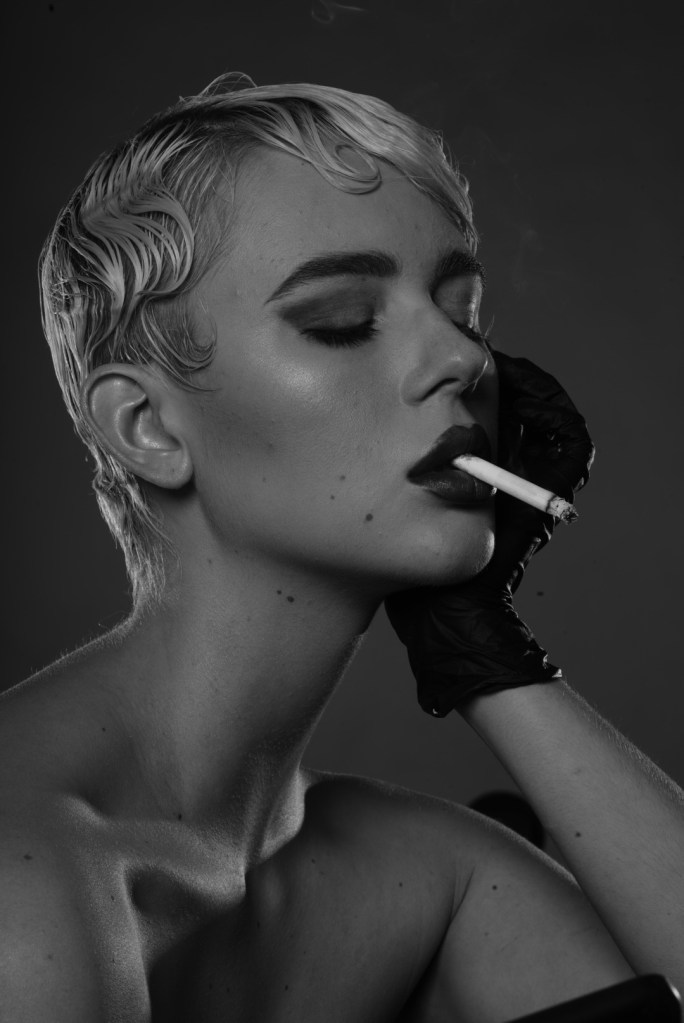
Getting The Shot

Here you can see the journey of exploration where I tried different poses and angles to find what works, slowly making small adjustments until I found the perfect angle that was both interesting, attention grabbing, and flattering. I had a tendency to want to look down or away because it felt moodier, but in the end I found looking into the camera to be the most captivating choice. First I followed the mood, then once I found it, I tweaked the photo to be cleaner and more impactful. This is my favourite way to work, since I find starting by trying to be perfect and flattering is too limiting and the photos end up coming out lifeless. Find what works, then tweak.

Final Thoughts:
Self-portraiture is a journey of self-expression, and the tools we use are merely extensions of our creativity. By sharing my journey, and this three-light setup, I hope to inspire fellow photographers to explore the potential within their means, proving that stunning images are not exclusive to large budgets, big teams of collaborators or extravagant equipment. Embrace the constraints, let creativity lead the way, and watch the magic unfold in each click of the shutter.

Feel free to leave a comment to your own self portraits, I’d love to see them!
Happy Shooting!

Posing 101: Proven Techniques for Every Occasion


Knowing how to strike the perfect pose can make all the difference in capturing attention and creating memorable images. Whether you’re gearing up for a professional photoshoot or just want to up your selfie game, mastering the art of posing is a valuable skill in the age of social media and constant photo-sharing. In this simple and comprehensive guide for posing beginners, we’ll explore tips and techniques that will help you shine in every shot.

Model Chelsey Boll strikes a simple but effective pose in studio for a self portrait. She has her weight on one leg with the other bent, and one hand is in the pocket of her baggy jeans while the other suggestively but subtly reaches into her shirt. Her face is angled to the side, and her eyes are looking down.

1. Understanding Your Body: The Foundation of a Great Pose

Get in front of a full length mirror! Before you even think about striking a pose, take a moment to understand your body and its natural lines.

Stand tall and straight with your shoulders back and your weight evenly distributed for a confident and poised foundation. If you have ever done yoga or ballet you might have heard to “imagine a string is pulling you up from the top of your head.” That’s exactly how you are going to begin. (In fact, taking yoga classes will help you a lot with increasing your connection to your body and your body awareness)

Next, you are going to experiment with subtle shifts in weight to find the most flattering angles for your body type. Simply shift your weight from your left foot to your right foot. Do this slightly differently each time, exploring different positioning for your shoulders, hips and knees. The first goal is to see how your body looks in different positions. Then, you can start to move faster and try to explore and get comfortable with fluid movements – almost like a dance.

Finally, you can incorporate your hands and feet. Experiment with placing your hands on your hips or in pockets, crossing your arms, or gently running your fingers through your hair. What happens if your feet are closer together? Further apart? One in front of the other? Take your time and have fun exploring all of the different thing that you can do and find what works for you, there are a hundred different ways to pose with your hands in your pockets so take your time and get to know as many as you can.

Model Chelsey Boll pulls a funny facial expression for a fashionable self portrait. Her lips are squished together and she is cross eyed.

2. Natural Facial Expressions: Less Is Often More

Also in front of the mirror, try moving your face around to different angles: left, right, up, down and everywhere in between. Congratulations! Each movement of your head is a whole different pose that you just unlocked and each one tells a unique story. Looking directly into the camera can convey confidence and connection, whereas gazing off into the distance or looking at an object just beyond the lens has a more candid feel. Looking up while smiling is a whimsical feeling, but if you look up even further and close your eyes it is almost spiritual. Looking down and smiling is shy and bashful, but looking down without a smile is somber. Do you see how each small change actually makes a whole different pose? What this means is that you actually don’t have to work as hard to pose as you think you do. A simple relaxed face with engaged eyes looking into the lens is going to be your most important expression, everything else is gravy.

In most cases the goal is to capture something real, so just express yourself naturally.

Chelsey Boll strikes a pose with her arms above her head. This pose is not as flattering as the photo on the right, though the differences are subtle.
Chelsey Boll strikes a pose with her arms above her head. This pose is much more flattering than the photo on the right, though the differences are subtle.

3. The Secret Ingredient: Unlocking your confidence

If all this time in front of the mirror has not helped you build confidence then you might just need to change your perspective. Literally.

The photos above are taken less than a minute apart and the only difference is the pose! One makes me feel great about how I look, the other… not so much. That doesn’t mean I look horrible, or even that the first photo is a bad pose, that just means that is not the best angle to capture that pose!

See, to take good flattering photos a lot of different elements need to come together at once. Lighting, hair and makeup, clothing, background, camera angle, and the right pose. You don’t fully understand how important these things are until you’ve done 100 photoshoots and seen yourself in all of these different contexts.

Every photo session has tons of outtakes where these things do not come together, otherwise shoots would go by very fast and you’d get it on the first click! As the photo subject, as long as you can show up and stay relaxed and be patient and trust the process enough to try different things and have fun, then you are doing great and should have great results.

And remember, if you don’t like photos of you so far, this does not mean you are ugly or not photogenic or not meant to be in front of a camera, you just haven’t seen yourself in the right context yet. Don’t give up!

Conclusion:

Mastering the art of posing takes practice and self-awareness. By understanding your body, experimenting with angles, and expressing yourself naturally, you can now confidently step in front of the camera and take stunning images. Whether it’s a professional photoshoot or a casual selfie, I hope these tips will help you put your best foot forward and make every photo a masterpiece. Most importantly, have fun posing!